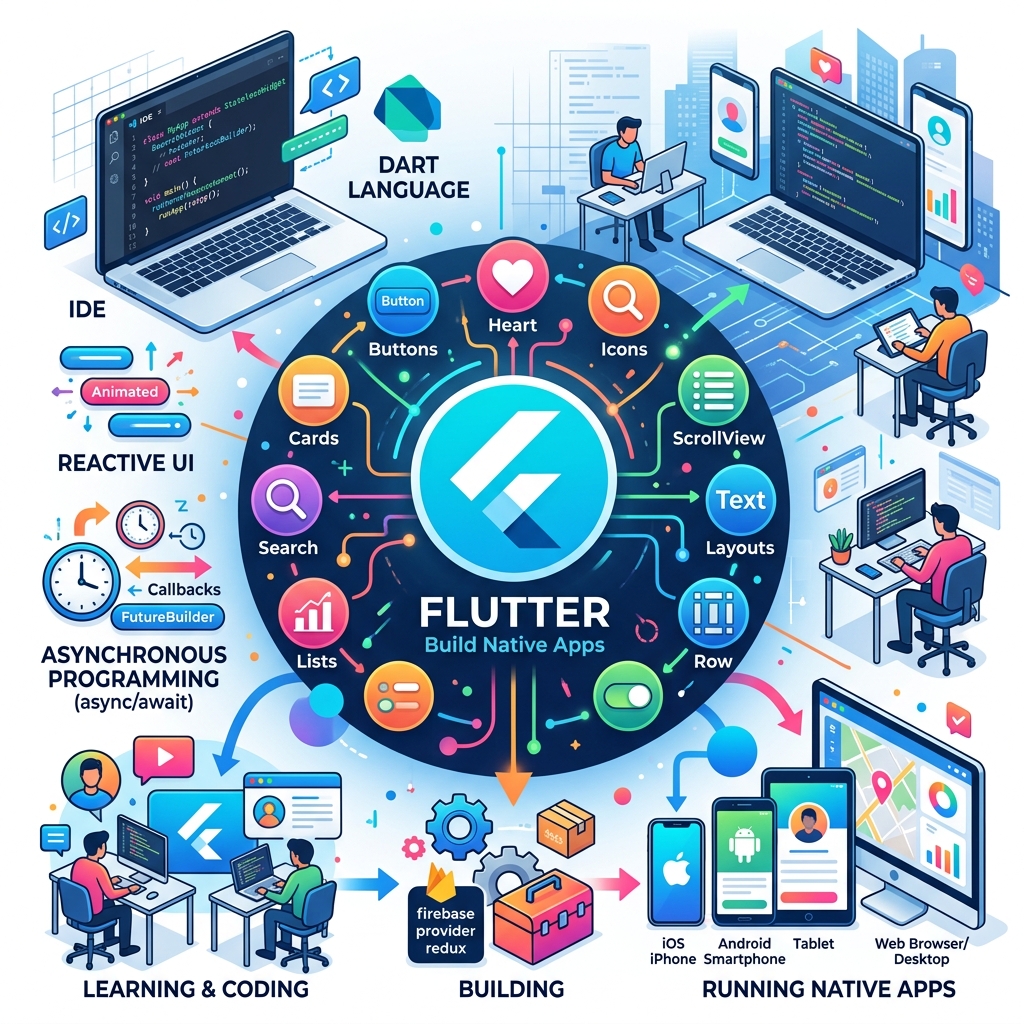
This comprehensive guide to Flutter development takes you from grasping Flutter’s core principles and widget-based architecture to setting up your development environment on Windows, macOS, or Linux using popular IDEs like Visual Studio Code and Android Studio. It walks through creating and running your first Flutter app, explains the project structure, and dissects the default counter app with clear code explanations. You’ll become familiar with essential widgets for building layouts, UI elements, and forms, and learn how Flutter’s reactive UI model leverages StatelessWidget, StatefulWidget, and the widget lifecycle. The guide covers state management from simple setState to advanced solutions like Provider, BLoC, and Riverpod, alongside navigation techniques via Navigator 1.0 and 2.0 APIs. Additionally, it introduces Dart’s asynchronous programming with Futures and async/await, enabling smooth handling of network operations. Key packages such as http for API communication, json_serializable for handling JSON data, shared_preferences for storing user preferences, and lottie for animations are covered with practical examples. The final sections recommend architectural patterns for scalable app development and curated community resources to continue your learning journey. This all-encompassing guide equips you with both theoretical knowledge and practical skills to build efficient, responsive Flutter applications.
Part 1: The Flutter Paradigm: Core Philosophy and Concepts
Embarking on the journey of learning Flutter is not just about writing code; it's about embracing a new way of thinking about user interface (UI) development. This initial part of the guide is dedicated to building a strong conceptual foundation. It will explore what Flutter is, the principles that guide its architecture, and the technical underpinnings that make it a powerful and efficient toolkit for modern app development. Understanding this paradigm is the first and most crucial step toward mastering Flutter.
Section 1.1: Introduction to Flutter and the Dart Language
Flutter is an open-source UI toolkit created by Google, designed for building beautiful, natively compiled applications for mobile, web, and desktop from a single codebase. Its primary value proposition lies in its ability to empower developers to create high-performance, high-fidelity user experiences that feel native to each platform, all without the need to maintain separate codebases for Android, iOS, Windows, macOS, Linux, and the web. At the heart of Flutter is the Dart programming language, also developed by Google. Dart is a client-optimized language for fast apps on any platform. It is a modern, object-oriented, and strongly typed language with a syntax that will feel familiar to developers coming from languages like Java, C#, or JavaScript. Its features, such as sound null safety and a rich standard library, make it particularly well-suited for building UIs, where managing complex data and state is paramount. A critical distinction that sets Flutter apart from many other cross-platform frameworks is its compilation strategy. Unlike frameworks that rely on a JavaScript bridge to communicate with native platform components, Flutter applications are compiled directly to native ARM or x64 machine code. This architectural choice is fundamental to Flutter's performance. By eliminating the bridge, it removes a common performance bottleneck, resulting in faster startup times, smoother animations (often achieving a consistent 60 or 120 frames per second), and a more responsive user experience overall. Therefore, when Flutter promises "natively compiled applications," it is referring to this direct-to-machine-code compilation that gives its apps a tangible performance advantage.
Further Reading:
- Official Documentation: Get started at the official Flutter website.
- Blog Post: Explore the (https://dart.dev/language) to understand its syntax and features.
- YouTube Video: The official (https://www.youtube.com/@flutterdev) is an excellent resource for visual learners.
Section 1.2: The Core Philosophy: "Everything is a Widget"
The central organizing principle of Flutter, and the most important concept for a new developer to internalize, is that "everything is a widget". In Flutter, widgets are not just the visible UI elements like buttons and text fields. They are the fundamental building blocks for the entire user interface, describing what their view should look like given their current configuration and state. This philosophy extends to all aspects of the UI:
- Structural Elements: A Scaffold that provides the basic app layout, an AppBar at the top of the screen, or even the root MaterialApp itself are all widgets.
- Visual Elements: The things a user sees and interacts with, such as Text, Icon, Image, and ElevatedButton, are widgets.
- Layout and Styling: Even non-visible elements that control arrangement and appearance are widgets. A Column arranges its children vertically, Padding adds space around another widget, and a Container can be used for styling with colors, borders, and margins. These do not have a visual representation of their own but exist solely to influence other widgets.
This approach encourages a compositional model, much like building with LEGO bricks. Instead of inheriting from a large, monolithic UI class, developers create complex user interfaces by composing many small, single-purpose widgets. For example, to create a centered piece of text with a white background, one would not modify a "Text" component's properties. Instead, one would wrap a Text widget inside a Center widget, which is then wrapped inside a Container widget with its color property set to white. This compositional hierarchy means that every Flutter app is a tree of widgets. Each widget nests inside a parent and can receive context from that parent, forming a chain that extends all the way to the root widget of the application.
Further Reading:
- Official Documentation: The Introduction to widgets guide is essential reading.
- Blog Post: GeeksforGeeks offers a great overview of what widgets are in Flutter.
- YouTube Video: The (https://www.youtube.com/playlist?list=PLjxrf2q8roU23XGwz3Km7sQZFTdB996iG) playlist provides quick, visual introductions to many different widgets.
Section 1.3: The Reactive UI Model and the Widget Lifecycle
Flutter employs a modern, reactive framework for building user interfaces, inspired by React. In this declarative paradigm, developers describe the UI for a given state. When that state changes—due to user interaction, data from a network, or any other event—the framework automatically and efficiently updates the UI to reflect the new state. The developer does not manually manipulate UI elements (e.g., textView.setText("New Value")); instead, they rebuild the widget tree with new data, and Flutter handles the rest. This model is built upon two fundamental types of widgets:
- StatelessWidget: A widget that describes a part of the user interface which depends only on the configuration information in the object itself. Stateless widgets are immutable; they have no internal state that can change over time. Once built, their properties cannot be altered. Icon, Text, and Padding are common examples. Most of the custom widgets created will be stateless.
- StatefulWidget: A widget that has mutable state. This is used when a part of the UI needs to change dynamically during the lifetime of the widget. A classic example is a counter that increments when a button is tapped, or a checkbox that can be toggled.
A key architectural decision in Flutter is the separation of the StatefulWidget from its State. The StatefulWidget class itself is immutable, just like a StatelessWidget. The mutable data is held in a separate State object, which is created by the framework. When the state of the app needs to change, the developer must call a special method called setState(). This method takes a callback function where the state variables are updated. Calling setState() signals to the Flutter framework that the internal state of this object has changed, which in turn triggers a rebuild of that widget's part of the UI. This separation is a deliberate design choice for performance. Because the State object is long-lived and persists across rebuilds, the framework can be very efficient. It can destroy and recreate the immutable widget descriptions (which are lightweight) whenever needed, without losing the underlying state associated with that part of the widget tree. This architecture is what allows Flutter to rebuild the UI frequently—often on every frame—without significant performance degradation, which is the very essence of a high-performance reactive framework.
Further Reading:
- Official Documentation: Read about the widget lifecycle and state in the Flutter fundamentals.
- Blog Post: This article provides a clear explanation of (https://medium.com/@singlapriyanka/simplifying-state-management-with-setstate-in-flutter-14283e60e3b5).
- YouTube Video: Watch this video on (https://www.youtube.com/watch?v=JFqB2FiXGzU) for a conceptual overview.
Section 1.4: Under the Hood: JIT and AOT Compilation
Flutter's ability to provide both a world-class developer experience and excellent end-user performance is largely due to its sophisticated dual-compilation strategy, powered by the Dart language.
- Just-In-Time (JIT) Compilation (for Development): During the development process, Flutter uses a JIT compiler. JIT compilation translates Dart code into native machine code on the fly, as it's needed. The primary benefit of this approach is the ability to enable Stateful Hot Reload. This is one of Flutter's most celebrated features. It allows developers to make changes to their code and see the results reflected in the running application—on a device or emulator—in under a second, without losing the current application state. For example, a developer can tweak the UI on the fourth screen of a navigation flow, hit save, and see the change instantly without having to restart the app and navigate back to that screen. This dramatically accelerates the development and iteration cycle.
- Ahead-Of-Time (AOT) Compilation (for Production): When an application is ready for release, the build process uses an AOT compiler. The AOT compiler translates the entire Dart codebase into efficient, native ARM or x64 machine code before the app is launched. This pre-compiled code is bundled with the application. The benefits are significant:
- Fast Startup: The app can start executing immediately without needing to be interpreted or compiled at runtime.
- Predictable Performance: Because the code is already native, execution is fast and predictable, leading to smooth animations and a responsive UI.
- Reduced Overhead: There is no need for a bridge or interpreter at runtime, which reduces CPU and memory load.
This dual-mode compilation strategy is not a compromise but rather a "best of both worlds" solution. It provides developers with the rapid, iterative workflow they need to be productive (via JIT and Hot Reload) while ensuring that the final product delivered to users is as performant and efficient as possible (via AOT). Further Reading:
- Official Documentation: The Flutter documentation provides an architectural overview that touches on compilation.
- Blog Post: This article offers a deep dive into (https://vibe-studio.ai/in/insights/utilizing-dart-s-native-compilation-for-lightning-fast-flutter-apps).
Part 2: Setting Up Your Development Forge: A Multi-Platform Installation Guide
With the core concepts understood, the next step is to prepare the development environment. This part provides a practical, step-by-step guide to installing Flutter and its dependencies on Windows, macOS, and Linux. The goal is to achieve a fully configured and verified setup, ready for building applications.
Section 2.1: System Prerequisites and Essential Tooling
Before installing the Flutter SDK, a few essential tools must be in place. These form the foundation of the development environment.
- Code Editor or Integrated Development Environment (IDE): While Flutter can be used with any text editor, the best experience is provided by an IDE with dedicated Flutter support. The two most recommended options are:
- Visual Studio Code (VS Code): A lightweight yet powerful and highly popular code editor with excellent Flutter and Dart extensions that provide features like syntax highlighting, code completion, and debugging.
- Android Studio: A full-featured IDE primarily for Android development, but with first-class support for Flutter through plugins. It includes the Android SDK, build tools, and an emulator, making it a convenient all-in-one solution for Android development.
- Git for Version Control: Flutter uses Git to manage its SDK and dependencies. Git must be installed on the system and available in the command-line path.
- Platform-Specific Toolchains: To build apps for a specific platform, its native build toolchain is required.
- For iOS and macOS Development: A Mac running the latest version of Xcode is required. Xcode provides the necessary compilers, tools, and simulators.
- For Android Development: The Android SDK is required, which is included with Android Studio.
- For Windows Development: Visual Studio with the "Desktop development with C++" workload is necessary to build Windows desktop applications.
Download Links:
Section 2.2: Step-by-Step Installation (Windows, macOS, Linux)
The installation process involves downloading the Flutter SDK, placing it in a suitable location on the file system, and adding its bin directory to the system's PATH environment variable. This last step is crucial as it allows the flutter command to be run from any terminal window.
Windows Installation
- 1. Download the Flutter SDK: Go to the (https://docs.flutter.dev/get-started/install/windows#get-the-flutter-sdk) and download the latest stable release for Windows. It will be a .zip file.
- 2. Extract the SDK: Create a folder where you want to store the SDK, for example, C:\src\flutter. Avoid placing it in a directory that requires elevated privileges, like C:\Program Files. Extract the contents of the downloaded zip file into this folder. The final path should look like C:\src\flutter\bin.
- 3. Update Your PATH: To make the flutter command globally accessible, you need to add it to your Path environment variable.
- - In the Start search bar, type 'env' and select Edit the system environment variables.
- - In the System Properties window, click the Environment Variables... button.
- - Under User variables, find the entry for Path, select it, and click Edit....
- - Click New and enter the full path to the bin directory inside your Flutter installation folder (e.g., C:\src\flutter\bin).
- - Click OK on all windows to apply the changes.
- 4. Verify Installation: Close and reopen any existing terminal windows. Open a new Command Prompt or PowerShell and run flutter --version to confirm that the command is recognized.
Visual Guide:
- YouTube Video: Watch this tutorial on (https://www.youtube.com/watch?v=saem2BrRikA) for a visual walkthrough.
macOS Installation
- 1. Download the Flutter SDK: Go to the (https://docs.flutter.dev/get-started/install/macos#get-the-flutter-sdk) and download the correct stable release for your Mac's processor (Apple Silicon or Intel).
- 2. Extract the SDK: Create a folder for the SDK, for example, \~/development. Open the Terminal and run the following command, replacing the paths as necessary:
unzip ~/Downloads/flutter_macos_*.zip -d ~/developmentThis will create a flutter directory inside \~/development. - 3. Update Your PATH: macOS uses Zsh as the default shell, which reads environment variables from the .zshenv file in your home directory.
- Open or create this file with a text editor: open -e \~/.zshenv.
- Add the following line to the file, replacing `` with the actual path to your Flutter folder (e.g., $HOME/development/flutter):
export PATH="/bin:$PATH" - Save the file and close the editor.
-
4. Install Xcode and CocoaPods:
-
- Install Xcode from the Mac App Store. After installation, open it once to accept the license agreement and let it install its command-line tools.
-
- Run the following commands in the terminal to configure the command-line tools and accept the license:
bash
sudo xcode-select -s /Applications/Xcode.app/Contents/Developer
sudo xcodebuild -license
-
- Flutter uses CocoaPods to manage dependencies for iOS development. Install it using Homebrew (recommended) or RubyGems :
bash sudo gem install cocoapods -
5. Verify Installation: Close and reopen your terminal. Run flutter --version to verify.
Visual Guide:
- YouTube Video: This video provides a step-by-step guide on (https://www.youtube.com/watch?v=b_9HxVirMcc).
Linux Installation
The recommended method for installing Flutter on most Linux distributions is using snapd.
- Install snapd: If your distribution does not have snapd pre-installed, follow the instructions on the snapcraft.io installation page.
- Install Flutter: Open your terminal and run the following command:
bash
   sudo snap install flutter --classic
This command downloads and installs the Flutter SDK and automatically adds the flutter command to your system's path.
- Install Additional Dependencies: Flutter on Linux requires a few extra libraries for its toolchain. Run flutter doctor (covered in Section 2.4) and it will list any missing dependencies, which can typically be installed using your distribution's package manager (e.g., apt, dnf).
- Verify Installation: In a new terminal window, run flutter --version.
Visual Guide:
- YouTube Video: For a visual walkthrough, see this tutorial on installing Flutter on Linux.
Section 2.3: Configuring Your IDE (Visual Studio Code & Android Studio)
After installing the SDK, the next step is to equip your chosen IDE with the necessary tools for a productive Flutter development workflow.
Visual Studio Code
- Launch VS Code.
- Open the Extensions view by clicking the icon in the Activity Bar on the side, or by pressing Ctrl+Shift+X.
- In the search bar, type Flutter.
- Select the Flutter extension published by Dart Code and click Install. This extension will automatically install the Dart extension as a dependency.
- Restart VS Code to complete the installation.
Android Studio / IntelliJ
- Launch Android Studio or your IntelliJ-based IDE.
- Open the plugin preferences:
- On Windows/Linux: File > Settings > Plugins.
- On macOS: Android Studio > Settings > Plugins.
- Select the Marketplace tab.
- In the search bar, type Flutter and select the Flutter plugin from the search results.
- Click Install. You will be prompted to also install the Dart plugin; click Yes.
- Once the installation is complete, click Restart IDE to apply the changes.
Section 2.4: The Health Check: Verifying Your Setup with flutter doctor
flutter doctor is a powerful and indispensable command-line tool that checks your environment and displays a report of the status of your Flutter installation. It is the single most important command for verifying your setup and troubleshooting issues. Open a new terminal and run:
flutter doctor
The tool performs a series of checks and provides a summary. A typical output looks like this:
[✓] Flutter (Channel stable, 3.x.x, on macOS 14.x.x, locale en-US) [✓] Android toolchain - develop for Android devices (Android SDK version 34.0.0) [✓] Xcode - develop for iOS and macOS (Xcode 15.x)` [✓] Chrome - develop for the web [✓] Android Studio (version 2023.x) [✓] VS Code (version 1.9x.x) [✓] Connected device (2 available) [✓] Network resources
- A checkmark
[✓]indicates that the component is installed and configured correctly. - An exclamation mark
[!]indicates a potential issue that needs to be addressed, but is not a blocker. The tool will often provide suggestions on how to fix it. - A cross
[✗]indicates a serious issue that will prevent you from using Flutter for a specific platform. - A question mark
[?]indicates that a tool is not installed.
Running flutter doctor is more than just a verification step; it serves as a valuable learning tool. Its output reveals the interconnected nature of the Flutter ecosystem. It shows that Flutter is not a self-contained monolith but rather a toolkit that relies on external, platform-specific toolchains. To build an Android app, Flutter must be able to find and use the Android SDK managed by Android Studio. To build an iOS app, it must interface with Xcode's compilers and signing tools. This understanding sets a realistic expectation for new developers: a Flutter developer must also be familiar with the basics of the native toolchains for the platforms they target.
Further Reading:
- Official Documentation: The (https://docs.flutter.dev/reference/flutter-cli#doctor) provides more details on the command.
- Blog Post: This article explains what flutter doctor is and how it works.
Part 3: From Zero to App: Building Your First Flutter Application
With the development environment fully configured and verified, it's time to transition from setup to creation. This part guides you through the process of creating, understanding, and running your first Flutter application. By dissecting the default counter app, the theoretical concepts from Part 1 will be connected to tangible, working code.
Section 3.1: Creating and Running a New Project
A new Flutter project can be created either through the command line or directly from your configured IDE. Both methods use the flutter create command under the hood to bootstrap a simple, runnable application.
Using the Command Line
- Navigate to the directory where you want to create your project folder (e.g., cd \~/development).
-
Run the flutter create command followed by your desired project name. Project names must be in lowercase_with_underscores format.
flutter create my_first_app -
This will create a new directory named my_first_app containing a complete Flutter project.
- Navigate into the new project directory: cd my_first_app.
Using Visual Studio Code
- Launch VS Code and open the Command Palette (Ctrl+Shift+P on Windows/Linux, Cmd+Shift+P on macOS).
- Type Flutter: New Project and select it.
- Choose the Application template.
- Select a parent directory to store the project.
- Enter a name for your project (e.g., my_first_app) and press Enter.
Using Android Studio
- Launch Android Studio and click New Flutter Project from the welcome screen, or File > New > New Flutter Project... if a project is already open.
- Select Flutter in the left pane.
- Ensure the Flutter SDK path is correct.
- Enter the Project name, Organization (in reverse domain format, e.g., com.example), and other details. The organization and project name are used to create the unique package name for Android and the Bundle ID for iOS.
- Click Create (or Finish).
Running the Application
Before running the app, you need a target device. This can be:
- An Android Emulator, which can be created and managed via the AVD Manager in Android Studio.
- An iOS Simulator (on macOS only), which is available if Xcode is installed.
- A physical Android or iOS device connected via USB with developer mode enabled.
- A web browser like Chrome.
- A desktop platform (Windows, macOS, or Linux).
Once a device is running and connected, you can launch your app:
- From the command line: Run flutter run from the project's root directory.
- From the IDE: Select the target device from the device dropdown in the toolbar and press the green "Run" button or press F5 in VS Code.
After a short build process, the default Flutter demo app will launch on your selected device.
Further Reading:
- Official Documentation: The (https://docs.flutter.dev/get-started/codelab) codelab is the definitive guide.
- YouTube Video: This official video,(https://www.youtube.com/watch?v=8sAyPDLorek), walks through the entire process.
Section 3.2: Anatomy of a Flutter Project: Key Files and Folders
The flutter create command generates a well-organized project structure. While there are many files and folders, a beginner should focus on two key items inside the project's root directory.
- lib/ folder: This is where almost all of your Dart code will live. The logic and UI for your application are built here.
- main.dart: This is the most important file in your project. It contains the main() function, which is the entry point for the application. When you run your app, the execution starts here. This file is responsible for initializing the app and running the root widget.
- pubspec.yaml: This file is the project's manifest and configuration file, written in YAML format. It is crucial for managing the project's metadata and dependencies. Its key roles include:
- Project Metadata: Defines the project's name, description, and version.
- Dependencies: Lists all the external packages (libraries) your project needs from the central Flutter package repository, pub.dev. When you add a package here and run flutter pub get, the tool downloads and links the library to your project.
- Assets: Declares assets that should be bundled with the app, such as images, fonts, or JSON files.
Other important folders include:
- android/ and ios/: These contain the native Android and iOS host projects, respectively. You will occasionally need to edit files here for platform-specific configurations, like adding permissions.
- test/: This folder is for writing automated tests for your application.
- web/, windows/, macos/, linux/: These contain the host projects for the other supported platforms.
For organizing the code within the lib/ directory, developers often adopt patterns like "feature-first" (grouping files by feature) or "layer-first" (grouping files by type, e.g., screens, services, models). While not critical for a small project, establishing a good structure early on is beneficial for scalability.
Further Reading:
- Official Documentation: Read about the structure of the pubspec.yaml file.
- Blog Post: This article provides an excellent guide to understanding the pubspec.yaml file. Another post explores different Flutter project structure approaches.
Section 3.3: Deconstructing the Default Counter App: A Code Walkthrough
The default application created by flutter create is a simple counter app. It serves as an excellent practical example of the core Flutter concepts discussed in Part
1. Let's break down the code in lib/main.dart.
// 1. Import the material library
import 'package:flutter/material.dart';
// 2. The main entry point of the app
void main() {
  runApp(const MyApp());
}
// 3. The root widget of the application (Stateless)
class MyApp extends StatelessWidget {
  const MyApp({super.key});
  @override
  Widget build(BuildContext context) {
    return MaterialApp(
      title: 'Flutter Demo',
      theme: ThemeData(
        colorScheme: ColorScheme.fromSeed(seedColor:olors.deepPurple),
        useMaterial3: true,
      ),
      home: const MyHomePage(title: 'Flutter Demo Home Page'),
    );
  }
}
// 4. The home page of the application (Stateful)
class MyHomePage extends StatefulWidget {
  const MyHomePage({super.key, required this.title});
  final String title;
  @override
  State<MyHomePage> createState() => _MyHomePageState();
}
// 5. The State object for the home page
class _MyHomePageState extends State<MyHomePage> {
  int _counter = 0; // The state variable
  void _incrementCounter() {
    // 6. Update the state within setState
    setState(() {
      _counter++;
    });
  }
  @override
  Widget build(BuildContext context) {
    // 7. The UI description for this state
    return Scaffold(
      appBar: AppBar(
        backgroundColor:heme.of(context).colorScheme.inversePrimary,
        title: Text(widget.title),
      ),
      body: Center(
        child: Column(
          mainAxisAlignment: MainAxisAlignment.center,
          children: <Widget>,
        ),
      ),
      floatingActionButton: FloatingActionButton(
        onPressed: _incrementCounter, // 8. Call the statepdating method
        tooltip: 'Increment',
        child: const Icon(Icons.add),
      ),
    );
  }
}
Code Breakdown:
- import 'package:flutter/material.dart';: This line imports the Material Design library, which contains a rich set of pre-built widgets like MaterialApp, Scaffold, AppBar, etc..
- void main() \=> runApp(const MyApp());: This is the Dart entry point. The runApp function takes the given widget (MyApp) and makes it the root of the widget tree.
- MyApp (StatelessWidget): This is the root widget. It's stateless because its configuration doesn't change over the app's lifetime. Its build method returns a MaterialApp widget, which sets up the top-level app configuration, including the theme and the home screen (home property).
- MyHomePage (StatefulWidget): This widget represents the main screen. It's stateful because its content (the counter) will change. Note that it doesn't have a build method itself; instead, it creates a State object via createState().
- _MyHomePageState: This class holds the mutable state for MyHomePage.
- int _counter \= 0;: This is the state variable. It holds the current count.
- _incrementCounter() and setState(): This method is called when the button is pressed. Crucially, the modification of _counter happens inside a call to setState(). This tells the Flutter framework that the state has changed and that it needs to re-run the build method of this State object to update the screen.
- build() method: This method describes the UI for the home page. It returns a Scaffold widget, which provides the standard mobile app layout. The UI is composed of other widgets: an AppBar for the top bar, a Center widget containing a Column to arrange two Text widgets vertically. One Text widget displays a static string, while the other displays the current value of the _counter variable.
- FloatingActionButton: This is the circular button at the bottom right. Its onPressed property is linked to the _incrementCounter method. When the button is tapped, _incrementCounter is called, setState is triggered, the _counter value is updated, and the build method runs again, causing the Text widget to display the new count. This is the reactive UI model in action.
Part 4: The Building Blocks: A Catalog of Essential Widgets
Mastering Flutter begins with mastering its building blocks: the widgets. This section serves as a practical reference to the most fundamental widgets used to structure layouts, display information, and gather user input. Each category will provide explanations and simple code examples to illustrate their use.
Section 4.1: Layout Widgets: Structuring Your UI
Layout in Flutter is not defined by a separate templating language; it is achieved by composing widgets whose sole purpose is to arrange other widgets.
Container
The Container is a highly versatile widget that combines common painting, positioning, and sizing functionalities. It can be used to add padding, margins, borders, background colors, or other decorations to a child widget. If it has no child, it will attempt to be as big as possible unless constrained by its parent or its own width and height properties.
Container(
  padding: const EdgeInsets.all(16.0),
  margin: const EdgeInsets.all(10.0),
  decoration: BoxDecoration(
    color: Colors.blue,
    border: Border.all(color: Colors.blue, width: 2),
    borderRadius: BorderRadius.circular(8),
  ),
  child: const Text('This is inside a Container'),
)
Row and Column
Row and Column are the two most fundamental layout widgets for arranging a list of child widgets linearly. Row arranges its children horizontally, while Column arranges them vertically. Their alignment and spacing are controlled by the mainAxisAlignment (along their primary axis) and crossAxisAlignment (along the perpendicular axis) properties.
Row(
  mainAxisAlignment: MainAxisAlignment.spaceEvenly, //attributes children evenly
  crossAxisAlignment: CrossAxisAlignment.center, // Center children vertically
  children: <Widget>[
    Icon(Icons.star, size: 50),
    Icon(Icons.star, size: 50),
    Icon(Icons.star, size: 50),
  ],
)
Stack
A Stack widget allows you to place widgets on top of one another, much like layers in an image editor. The first widget in the children list is the bottom-most layer, and subsequent widgets are painted on top. The Positioned widget can be used on children of a Stack to control their location relative to the stack's edges.
Stack(
  alignment: Alignment.center,
  children: <Widget>,
)
ListView
ListView is the most commonly used scrolling widget. It displays its children one after another in the scroll direction (vertically by default). It is ideal for displaying a list of items that might be too long to fit on the screen. For long or infinite lists, the ListView.builder constructor is more efficient as it only builds the items that are currently visible on screen.
ListView(
  padding: const EdgeInsets.all(8),
  children: <Widget>[
    Container(
    height: 50,
    color: Colors.amber,
    child: const Center(child: Text('Entry A')),
    ),
    Container(
      height: 50,
      color: Colors.amber,
      child: const Center(child: Text('Entry B')),
    ),
    Container(
      height: 50,
      color: Colors.amber,
      child: const Center(child: Text('Entry C')),
    ),
  ],
)
Further Reading:
- Official Documentation: The (https://docs.flutter.dev/ui/layout) page is the best place to start.
- Tutorial: The (https://docs.flutter.dev/ui/layout/tutorial) provides a comprehensive, hands-on example.
- YouTube Video: This video from the Flutter team covers (https://www.youtube.com/watch?v=NrXQuAHf1mc).
Section 4.2: Basic UI Widgets: The Visual Elements
These are the widgets that form the visible interface of the application.
Scaffold
The Scaffold widget implements the basic Material Design visual layout structure. It provides a framework for the most common UI elements of an app, providing APIs (slots) for things like an appBar, a body, a floatingActionButton, a drawer, and a bottomNavigationBar. Most of your app's screens will start with a Scaffold.
Scaffold(
  appBar: AppBar(
    title: const Text('My App'),
  ),
  body: const Center(
    child: Text('Hello, World!'),
  ),
  floatingActionButton: FloatingActionButton(
    onPressed: () {
    // Add your onPressed code here!
    },
    child: const Icon(Icons.add),
  ),
)
AppBar
An AppBar is a Material Design app bar that is typically displayed at the top of a Scaffold. It can contain a title, actions (like icon buttons), and a leading widget (often a menu or back icon).
Text
The Text widget is used to display a string of text with a single style. You can customize its appearance using the style property, which takes a TextStyle object to control font size, color, weight, and more.
const Text(
  'This is some styled text.',
  style: TextStyle(
    fontSize: 24,
    fontWeight: FontWeight.bold,
    color: Colors.indigo,
  ),
)
Icon
The Icon widget displays a graphical icon. Flutter includes a vast library of Material Design icons, accessible via the Icons class. Their color and size can be easily customized.
const Icon(
  Icons.favorite,
  color: Colors.pink,
  size: 30.0,
)
Image
The Image widget is used to display images. It has several constructors for loading images from different sources:
- Image.asset(): For images bundled with the app in the assets folder.
- Image.network(): For images loaded from a URL.
- Image.file(): For images loaded from the user's device.
- Image.memory(): For images loaded from a Uint8List in memory.
// Assuming 'assets/logo.png' is defined in pubspec.yaml
Image.asset('assets/logo.png')
// Loading an image from the internet
Image.network('https://flutter.dev/images/flutter-logosharing.png')`
ElevatedButton
ElevatedButton is a Material Design button that appears "elevated" or raised from the surface. It's typically used for primary actions in an app. Its onPressed callback is triggered when the user taps it, and its child is the content displayed on the button, usually a Text widget.
ElevatedButton(
  onPressed: () {
    print('Button pressed!');
  },
  child: const Text('Click Me'),
)
Further Reading:
- Official Documentation: Explore the(https://docs.flutter.dev/ui/widgets/basics).
- Tutorial: The Flutter UI introduction covers many of these widgets in context.
- YouTube Video: The(https://www.youtube.com/playlist?list=PLOU2XLYxmsIJyiwUPCou_OVTpRIn_8UMd) playlist is a great introduction.
Section 4.3: Input & Forms: Gathering User Data
Input widgets are essential for creating interactive applications that can accept and process user data.
TextField
TextField is the primary widget for allowing users to enter text via a keyboard. It's highly customizable through its decoration property, which takes an InputDecoration object. This allows for adding hint text, labels, icons, and borders. To manage the text within a TextField, a TextEditingController is typically used. This controller allows you to read the text the user has entered and programmatically change it.
// In your State class:
final myController = TextEditingController();
// In your build method:
TextField(
  controller: myController,
  decoration: InputDecoration(
    border: OutlineInputBorder(),
    labelText: 'Username',
    hintText: 'Enter your username',
  ),
)
TextFormField
TextFormField is a specialized version of TextField designed to be used within a Form widget. It integrates TextField with the Form's state, enabling easy validation and data submission. It includes a validator property that takes a function to check the input. If the input is invalid, the function returns an error string to be displayed; otherwise, it returns null.
// Within a Form widget:
TextFormField(
  decoration: const InputDecoration(
    labelText: 'Password',
  ),
  obscureText: true, // Hides the text for passwords
  validator: (value) {
    if (value == null || value.isEmpty) {
      return 'Please enter your password';
    }
    if (value.length < 6) {
      return 'Password must be at least 6 characters long';
    }
    return null; // Return null if the input is valid
  },
)
Further Reading:
- Official Documentation: The User input page provides a broad overview of interactive widgets.
- Cookbook: The Forms cookbook contains practical recipes for handling text fields, validation, and focus.
- Blog Post: This tutorial provides a(https://www.dhiwise.com/post/flutter-textformfield-decoded-a-comprehensive-tutorial).
Part 5: Managing the Flow: State, Navigation, and Data
Building a static UI is only the first step. To create a functional, dynamic application, a developer must understand how to manage the application's state, navigate between different screens, and handle time-consuming operations like fetching data from the internet. This part introduces these essential, non-UI concepts.
Section 5.1: The Heart of Interactivity: State Management Explained
State management is the process of managing the data that your application uses to render its UI and respond to user interactions. As an app grows, managing this state effectively becomes one of the most critical architectural challenges.
The Foundation: setState
As discussed previously, the most basic form of state management is using a StatefulWidget and the setState() method. This approach is called "ephemeral state" or "local state" management because the state is contained within a single widget. It is perfectly suitable for simple cases, like toggling a checkbox or managing the text in a single form field. However, setState has limitations. When state needs to be shared across multiple screens or widely separated widgets in the widget tree (often called "app state"), passing data and callbacks down through widget constructors becomes cumbersome and error-prone. This practice, known as "prop drilling," can make the code difficult to read and maintain.
Advanced State Management Solutions
For managing app state, the Flutter community has developed several powerful and scalable solutions. These libraries provide more sophisticated ways to access, update, and listen to state from anywhere in the app. The three most popular choices for beginners to be aware of are Provider, BLoC, and Riverpod.
| Library | Core Concept | Learning Curve | Boilerplate | Best For |
|---|---|---|---|---|
| Provider | A wrapper around InheritedWidget that simplifies dependency injection and state management. Relies on the widget tree's BuildContext to provide and access state. | Low | Medium | Simple to medium-sized apps where rapid development is a priority. A great first step beyond setState. |
| BLoC | Stands for Business Logic Component. A pattern that uses streams to manage the flow of data. It strictly separates business logic from the UI by using events as input and states as output. | High | High | Complex applications with intricate business logic and multiple data streams where a strict separation of concerns is critical for scalability and testability. |
| Riverpod | A compile-safe dependency injection and state management solution. It is a complete rewrite of Provider that solves many of its common issues, most notably by being independent of the BuildContext. | Medium | Low | Any size of application. It is often considered more flexible, robust, and less error-prone than Provider, making it a strong default choice for new projects. |
Choosing a state management solution is a key architectural decision. For a beginner, a common learning path is to master setState for local state, then learn Provider for its simplicity in managing shared app state, and later explore BLoC or Riverpod as the complexity of their applications grows.
Further Reading:
- Official Documentation: The (https://docs.flutter.dev/data-and-backend/state-mgmt) is the best starting point.
- Blog Post: This article provides a great comparison of (https://www.dhiwise.com/post/flutter-insights-navigating-the-riverpod-vs-bloc-puzzle).
- YouTube Video: This video from the Flutter team explains pragmatic state management.
Section 5.2: Navigating Your App: An Introduction to Routing
Nearly every application consists of multiple screens or pages. Navigation is the process of moving between these screens, while routing is the system that manages this flow. In Flutter, navigation is managed by a Navigator widget, which maintains a stack of Route objects. A Route is an abstraction for a screen or page.
Navigator 1.0: Imperative Routing
The traditional and most straightforward way to handle navigation is with the Navigator 1.0 API. It is an imperative approach where you explicitly command the Navigator to perform an action.
- Pushing a new screen: To navigate to a new screen, you push a new Route onto the navigation stack. This new route becomes the active one, and its screen is displayed. The MaterialPageRoute is commonly used as it provides a platform-adaptive transition animation.
dart
  Navigator.push(
    context,
    MaterialPageRoute(builder: (context) => const SecondScreen()),
  );
- Popping a screen: To return to the previous screen, you pop the current Route from the top of the stack. This reveals the screen below it.
dart
  Navigator.pop(context);
For most simple and moderately complex apps, the Navigator 1.0 API is sufficient and easy to understand.
Navigator 2.0: Declarative Routing
For more advanced use cases, such as handling deep links (opening the app to a specific screen from a URL), managing complex nested navigation, or building for the web where the browser's address bar needs to be synchronized with the app's state, Flutter introduced the Navigator 2.0 API. Navigator 2.0 is a declarative API. Instead of issuing commands like push and pop, you describe the entire navigation stack as a function of your application's state. When the state changes, the navigation stack updates accordingly. This provides much more control but comes with a significantly higher level of complexity, involving new concepts like Router, RouterDelegate, and RouteInformationParser. For beginners, it is highly recommended to start with and master Navigator 1.0. As application requirements become more complex, exploring Navigator 2.0 or popular routing packages that simplify it, such as go_router or auto_route, becomes a logical next step.
Further Reading:
- Official Documentation: The Navigation and routing page provides a comprehensive overview.
- Cookbook: The Navigate to a new screen and back recipe is a perfect practical start.
- YouTube Video: This Flutter Navigation tutorial provides a clear visual explanation.
Section 5.3: Handling Asynchronous Operations in Dart (Future, async/await)
Modern applications frequently perform operations that don't complete immediately, such as fetching data from a network, reading a file from disk, or querying a database. These are known as asynchronous operations. In a single-threaded environment like Dart, running these operations synchronously would block the main thread, freezing the UI and creating a poor user experience. Dart provides robust support for asynchronous programming using Future objects and the async and await keywords.
- Future: A Future is an object that represents the result of an asynchronous operation. It's a promise that you will get a value (or an error) at some point in the future. When an asynchronous function is called, it immediately returns an uncompleted Future. When the operation finishes, the Future "completes" with either a value or an error.
- async and await: These keywords provide a declarative and readable way to work with Futures.
- async: You mark a function with the async keyword to indicate that it performs asynchronous operations. An async function automatically returns a Future.
- await: Inside an async function, you can use the await keyword before calling another asynchronous function. This pauses the execution of the current function until the awaited Future completes, without blocking the application's main thread. Once the Future completes, await returns the resulting value, and the function continues its execution.
This async/await syntax is essentially "syntactic sugar" over a more complex API that uses callbacks (.then()). For a beginner, async/await is far superior because it allows asynchronous code to be written in a linear, sequential style that is much easier to read, understand, and debug, avoiding the "callback hell" that can arise from deeply nested callbacks. Here is a typical example of fetching data from a network, including error handling:
Future<String> fetchData() async {
  try {
      // Await the result of the http.get() Future.
      final response = await http.get(Uri.parse('https://jsonplaceholder.typicode.com/posts/1'));
      if (response.statusCode == 200) {
        // If the server returns an OK response, return the body.
        return response.body;
      } else {
        // If the server did not return a 200 OK response,
        // then throw an exception.
        throw Exception('Failed to load data');
      }
  } catch (e) {
    // Handle any errors that occur during the network call.
    print('An error occurred: $e');
    rethrow; // Re-throw the exception to be handled by the caller.
  }
}
Further Reading:
- Official Documentation: The Asynchronous programming tutorial in the Dart docs is the definitive guide.
- Blog Post: This article provides a great overview of(https://vibe-studio.ai/in/insights/understanding-futures-and-async-await-in-dart).
- YouTube Video: This video explains(https://www.youtube.com/watch?v=rWMnAkDrhg8) clearly. Another video provides a practical example with try-catch blocks.
Part 6: Expanding Your Toolkit: Essential Libraries and Packages
While Flutter's core SDK is incredibly powerful, much of its strength comes from the vast ecosystem of packages available on pub.dev, the official package repository for Dart and Flutter. These packages provide pre-built solutions for common tasks, accelerating development and allowing developers to focus on their app's unique features. This section introduces some of the most essential packages for common development needs.
Section 6.1: Communicating with the Web: The http Package
Almost every modern app needs to communicate with a server over the internet, typically to fetch or send data via a REST API. The http package is the standard, community-supported solution for making HTTP requests in Flutter. 1. Add the Dependency: To use the package, first add it to your pubspec.yaml file under dependencies:
dependencies:
  flutter:
    sdk: flutter
    http: ^1.2.0 # Use the latest version from pub.dev
Then, run flutter pub get in your terminal to install it. 2. Configure Platform Permissions: Network access requires permissions.
- Android: In android/app/src/main/AndroidManifest.xml, add the INTERNET permission:
xml
  <uses-permission android:name="android.permission.INTERNET" />
- macOS: In macos/Runner/DebugProfile.entitlements and macos/Runner/Release.entitlements, add the network client entitlement:
xml
  <key>com.apple.security.network.client</key>
  <true/>
. 3. Make a GET Request: Here is an example of fetching data from the JSONPlaceholder API. The http.get() method returns a Future\<Response>, which can be handled using async/await.
import 'package:http/http.dart' as http;
import 'dart:convert';

Future<void> fetchPost() async {
  final url = Uri.parse('https://jsonplaceholder.typicode.com/posts/1');
  try {
      final response = await http.get(url);

      if (response.statusCode == 200) {
        // Successful request
        final data = jsonDecode(response.body);
        print('Title: ${data['title']}');
      } else {
        // Request failed
        print('Request failed with status: ${response.statusCode}.');
      }
  } catch (e) {
    print('An error occurred: $e');
  }
}
Further Reading:
- Package: Find the http package on pub.dev.
- Cookbook: The official cookbook has excellent recipes for fetching data and sending data.
- YouTube Video: This tutorial covers how to make API calls with Flutter.
Section 6.2: Working with Data: JSON Serialization
Data from web APIs is most commonly formatted as JSON (JavaScript Object Notation). Serialization is the process of converting a Dart object into a JSON string to send to a server, while deserialization is the reverse process of converting a JSON string from a server into a Dart object that your app can work with.
Manual Serialization with dart:convert
For simple cases, you can manually handle JSON using the built-in dart:convert library. This involves using jsonDecode() to parse a JSON string into a Map\<String, dynamic> and then manually creating a model object from that map.
import 'dart:convert';

class User {
  final String name;
  final String email;
  User({required this.name, required this.email});
  // Factory constructor for deserialization
  factory User.fromJson(Map<String, dynamic> json) {
    return User(
      name: json['name'],
      email: json['email'],
    );
  }
}

void processUserJson(String jsonString) {
  final Map<String, dynamic> userMap = jsonDecode(jsonString);
  final user = User.fromJson(userMap);
  print('User name: ${user.name}');
}
Automated Serialization with json_serializable
For larger applications with many complex models, manual serialization becomes tedious and error-prone. The recommended approach is to use code generation with the json_serializable package. This package automatically generates the serialization logic for you based on annotations in your model classes. 1. Add Dependencies: Add json_annotation to dependencies and build_runner and json_serializable to dev_dependencies in pubspec.yaml.
dependencies:
  flutter:
    sdk: flutter
    json_annotation: ^4.9.0
dev_dependencies:
  flutter_test:
    sdk: flutter
    build_runner: ^2.4.9
    json_serializable: ^6.8.0
2. Annotate Your Model Class: Create your model class and add the necessary annotations and part directive.
import 'package:json_annotation/json_annotation.dart';
part 'user.g.dart'; // This file will be generated

@JsonSerializable()
class User {
  final String name;
  final String email;
  User({required this.name, required this.email});
  factory User.fromJson(Map<String, dynamic> json) => _$UserFromJson(json);
  Map<String, dynamic> toJson() => _$UserToJson(this);
}
3. Run the Code Generator: In your terminal, run the build command to generate the user.g.dart file, which will contain the serialization logic.
flutter pub run build_runner build
This approach is more robust, less prone to typos, and scales much better for complex data models. Further Reading:
- Official Documentation: The(https://docs.flutter.dev/data-and-backend/serialization/json) page is a must-read.
- Package: View the json_serializable package on pub.dev.
- YouTube Video: This tutorial explains(https://www.youtube.com/watch?v=PxkCCIqzPHw).
Section 6.3: Persistent Storage: shared_preferences
Often, an app needs to save small amounts of simple data that should persist even when the app is closed and reopened, such as user settings (e.g., dark mode preference), authentication tokens, or a high score. For this type of key-value storage, the shared_preferences package is the ideal solution. It provides a simple, cross-platform API for storing primitive data types (int, double, bool, String, and List\<String>). 1. Add the Dependency: Add shared_preferences to pubspec.yaml and run flutter pub get.
dependencies:
  flutter:
    sdk: flutter
    shared_preferences: ^2.2.3
2. Save, Read, and Remove Data: The API is asynchronous and uses async/await.
import 'package:shared_preferences/shared_preferences.dart';
// To save data
Future<void> saveThemePreference(bool isDarkMode) async {
  final prefs = await SharedPreferences.getInstance();
  await prefs.setBool('isDarkMode', isDarkMode);
}
// To read data
Future<bool> getThemePreference() async {
  final prefs = await SharedPreferences.getInstance();
  // Use the null-aware operator '??' to provide a default value.
  return prefs.getBool('isDarkMode')?? false;
}
// To remove data
Future<void> removeThemePreference() async {
  final prefs = await SharedPreferences.getInstance();
  await prefs.remove('isDarkMode');
}
It's important to note that shared_preferences is not designed for storing large amounts of data or sensitive information like passwords, as the data is not encrypted by default. For those use cases, a local database like sqlite or secure storage like flutter_secure_storage would be more appropriate.
Further Reading:
- Package: Find the shared_preferences package on pub.dev.
- Cookbook: The (https://docs.flutter.dev/cookbook/persistence/key-value) recipe provides a complete example.
- Blog Post: This is the (https://medium.com/@pinkisingh/ultimate-guide-to-using-shared-preferences-in-flutter-711efd28c2ec).
Section 6.4: Bringing Your App to Life with Animations
Animations are crucial for creating a polished, professional, and engaging user experience. Flutter has a powerful built-in animation system, which can be broadly divided into two types: implicit and explicit animations. While the built-in system is highly capable, integrating complex, pre-designed animations can be simplified with packages. The lottie package is a fantastic tool for this. It allows you to render high-quality animations created in Adobe After Effects (and exported as JSON files) directly in your Flutter app. This decouples animation design from development, allowing designers to create complex vector animations that can be easily dropped into an app without manual coding of curves and tweens. 1. Add the Dependency: Add lottie to pubspec.yaml and run flutter pub get.
dependencies:
  flutter:
    sdk: flutter
    lottie: ^3.1.2
2. Add Animation Asset:
- Download a Lottie JSON file from a source like LottieFiles.
- Create an assets folder in your project's root directory.
- Place the .json file inside (e.g., assets/loading_animation.json).
- Declare the assets folder in your pubspec.yaml:
yaml
  flutter:
    uses-material-design: true
    assets:
      - assets/
3. Display the Animation: Use the Lottie.asset() widget to display the animation.
import 'package:lottie/lottie.dart';

class MyAnimation extends StatelessWidget {
  const MyAnimation({super.key});
  @override
  Widget build(BuildContext context) {
    return Scaffold(
      body: Center(
        // Load a Lottie file from your assets
        child: Lottie.asset('assets/loading_animation.json'),
      ),
    );
  }
}
The lottie package also provides constructors for loading animations from the network (Lottie.network) and gives you fine-grained control over the animation's playback using an AnimationController.
Further Reading:
- Package: View the lottie package on pub.dev.
- Official Documentation: The Introduction to animations page explains Flutter's native animation system.
- YouTube Video: This tutorial demonstrates Lottie animations in Flutter.
Part 7: Next Steps and Continued Learning
Completing this guide marks the end of the beginning of your Flutter journey. You now have a solid foundation in the core concepts, a working development environment, and the practical skills to build a basic application and expand its functionality with essential packages. The path to mastery is one of continuous learning and building. This final part provides a roadmap for what to explore next.
Section 7.1: Recommended Project Architectures
As your applications grow beyond a few screens, simply placing all your code in the lib directory becomes unmanageable. Adopting a clear project structure and application architecture is vital for maintainability, scalability, and collaboration. Consider exploring these common patterns:
- Feature-first vs. Layer-first: This is a fundamental choice in project organization.
- Layer-first: You group files by their technical role (e.g., all screens in a screens folder, all data models in a models folder). This is simple to start with but can become difficult to navigate as files related to a single feature are scattered across many folders.
- Feature-first: You create a top-level folder for each feature of your app (e.g., authentication, product_details). Inside each feature folder, you then create subfolders for layers (screens, logic, models). This approach scales much better, as all the code for a single feature is co-located, making it easier to find, modify, or even remove.
- Architectural Patterns: Beyond folder structure, consider learning about application architecture patterns that separate concerns. This involves dividing your code into distinct layers with clear responsibilities, such as:
- Presentation Layer: The UI (your widgets).
- Application/Business Logic Layer: The state management logic (e.g., your BLoCs or Riverpod Notifiers).
- Data Layer: Responsible for fetching and storing data (e.g., repositories that talk to APIs or a local database).
Adopting a clean architecture from the start will pay significant dividends in the long run, making your code more testable, reusable, and easier to reason about. Further Reading:
- Blog Post: CodewithAndrea provides an excellent series on Flutter App Architecture that is highly recommended for your next steps.
Section 7.2: Curated Resources for Your Flutter Journey
The Flutter community is vibrant, active, and produces a wealth of high-quality learning materials. As you continue your journey, these resources will be invaluable.
- Official Flutter YouTube Channel: A primary source for official announcements, tutorials, and deep dives into specific topics like the "Widget of the Week" and "Package of the Week" series.
- The Flutter Cookbook: An official collection of practical, problem-solving recipes for common development tasks, from UI and navigation to networking and persistence.
- Flutter Gems: A curated directory of over 6,700 Dart and Flutter packages, categorized by functionality. It is an essential tool for discovering the best package for any given task.
- Flutter Codelabs: Step-by-step, hands-on tutorials from Google that guide you through building real applications and learning specific features.
- Community Blogs and Channels: Many experienced developers share their knowledge through blogs and YouTube channels. Some highly regarded resources include:
- CodewithAndrea: In-depth articles and courses on Flutter best practices and architecture.
- Net Ninja: A comprehensive beginner-friendly tutorial series on YouTube.
- Reso Coder: Tutorials focusing on clean architecture and test-driven development.
The most effective way to learn is by building. Take the concepts from this guide, think of a simple app idea, and start coding. When you encounter a problem, consult the documentation, search for a cookbook recipe, or explore the community resources. Each challenge you overcome will solidify your understanding and expand your skills. Welcome to the Flutter community.
Works cited
- - Install Flutter on Linux | Snap Store - Snapcraft, https://snapcraft.io/flutter
- - Android Studio Setup for Flutter Development - GeeksforGeeks, -https://www.geeksforgeeks.org/android/android-studio-setup-for-flutter-development/>
- - Docs | Flutter, https://docs.flutter.dev/
- - Your first Flutter app - Google Codelabs, https://codelabs.developers.google.com/codelabs/flutter-codelab-first
- - Utilizing Dart's Native Compilation for Lightning-Fast Flutter Apps, https://vibe-studio.ai/in/insights/utilizing-dart-s-native-compilation-for-lightning-fast-flutter-apps
- - Flutter - YouTube, https://www.youtube.com/@flutterdev
- - Widgets | Flutter, https://docs.flutter.dev/get-started/fundamentals/widgets
- - What is Widgets in Flutter? - GeeksforGeeks, https://www.geeksforgeeks.org/flutter/what-is-widgets-in-flutter/
- - Basics | Flutter, https://docs.flutter.dev/ui/widgets/basics
- - Layout | Flutter, https://docs.flutter.dev/ui/layout
- - Videos - Flutter Documentation, https://docs.flutter.dev/resources/videos
- - Building user interfaces with Flutter, https://docs.flutter.dev/ui
- - Reactive UI with Dart and Flutter: Building Dynamic User Interfaces - Cloud Devs, https://clouddevs.com/dart/reactive-ui/
- - Simplifying State Management with setState in Flutter | by Priyanka Singla | Medium, https://medium.com/@singlapriyanka/simplifying-state-management-with-setstate-in-flutter-14283e60e3b5
- - Flutter setState - The simplest state management in Flutter, https://themobilecoder.com/flutter-setstate-the-simplest-state-management-in-flutter/
- - This is my approach to state management in Flutter - YouTube, https://www.youtube.com/watch?v=JFqB2FiXGzU
- - How to Run a Flutter App in VS Code: Step-by-Step Guide - F22 Labs, https://www.f22labs.com/blogs/how-to-run-a-flutter-app-in-vs-code-a-step-by-step-guide/
- - Start building Flutter native desktop apps on macOS, https://docs.flutter.dev/get-started/install/macos/desktop
- - Install Flutter on Windows in 2025 - YouTube, https://www.youtube.com/watch?v=l2TvAVkCgIE
- - Windows | Flutter, https://docs.flutter.dev/get-started/install/windows
- - How to install Flutter on Windows 11 (Updated 2025) - YouTube, https://www.youtube.com/watch?v=saem2BrRikA
- - Flutter: play youtube videos on flutter windows app - Stack Overflow, https://stackoverflow.com/questions/79673761/flutter-play-youtube-videos-on-flutter-windows-app
- - Flutter Crash Course #3 - Installing on a Mac - YouTube, https://www.youtube.com/watch?v=BwKfjzxTGXI
- - First Time Installing Flutter on My MacBook Pro M4 Pro — Let's Go! - YouTube, https://www.youtube.com/watch?v=b_9HxVirMcc
- - Install Flutter on Linux in 2025 | Flutter desktop Linux setup - YouTube, https://www.youtube.com/watch?v=RFSF4t5FQhg
- - Every Things You Need To Know About Flutter Doctor | CodeEpsilon, https://www.codeepsilon.com/do-you-know-about-flutter-doctor/
- - Create a new Flutter app, https://docs.flutter.dev/reference/create-new-app
- - How to Download and Install Flutter on Windows 10/11 2025 - YouTube, https://www.youtube.com/watch?v=gENlfLd3WFk
- - Write your first app - Flutter Documentation, https://docs.flutter.dev/get-started/codelab
- - Building your first Flutter App - with a Codelab! - YouTube, https://www.youtube.com/watch?v=8sAyPDLorek\&pp=0gcJCfwAo7VqN5tD
- - Custom Files | FlutterFlow Documentation, https://docs.flutterflow.io/concepts/custom-code/custom-files/
- - Configuration Files | FlutterFlow Documentation, https://docs.flutterflow.io/concepts/custom-code/custom-files
- - Understanding the pubspec.yaml File in Flutter: A Comprehensive ..., https://medium.com/@omartaamallah4/understanding-the-pubspec-yaml-file-in-flutter-a-comprehensive-guide-1c93f0245ceb
- - Flutter Project Structure: Feature-first or Layer-first? - Code With Andrea, https://codewithandrea.com/articles/flutter-project-structure/
- - Create Counter App :: Flutter Tutorial - Learn App Development, https://flutter-tutorial.net/introduction-and-basics/create-couter-app-in-flutter/
- - Top 5 Layout Widgets in Flutter | Must-Know Flutter UI Widgets Tutorial - YouTube, https://www.youtube.com/watch?v=FUdS9bqOeJM
- - Layout tutorial | Flutter, https://docs.flutter.dev/ui/layout/tutorial
- - Flutter Basics - Layouts - YouTube, https://www.youtube.com/watch?v=NrXQuAHf1mc
- - Flutter Widgets 101 - YouTube, https://www.youtube.com/playlist?list=PLOU2XLYxmsIJyiwUPCou_OVTpRIn_8UMd
- - Mastering Flutter TextFormField: The Ultimate Guide - DhiWise, https://www.dhiwise.com/post/flutter-textformfield-decoded-a-comprehensive-tutorial
- - Create and style a text field | Flutter, https://docs.flutter.dev/cookbook/forms/text-input
- - Handling user input - Flutter Documentation, https://docs.flutter.dev/get-started/fundamentals/user-input
- - State management - Flutter Documentation, https://docs.flutter.dev/get-started/fundamentals/state-management
- - A Comprehensive Guide to Riverpod Vs. BLoC in Flutter - DhiWise, https://www.dhiwise.com/post/flutter-insights-navigating-the-riverpod-vs-bloc-puzzle
- - Introduction to Navigation and Routing in Flutter | by Reme Le Hane, https://remelehane.medium.com/introduction-to-navigation-and-routing-in-flutter-de72c3c09c11
- - Routing/navigation in Flutter : r/FlutterDev - Reddit, https://www.reddit.com/r/FlutterDev/comments/u43t86/routingnavigation_in_flutter/
- - Navigate to a new screen and back - Flutter Documentation, https://docs.flutter.dev/cookbook/navigation/navigation-basics
- - Understanding Flutter Navigator 2.0 | Codemagic Blog, https://blog.codemagic.io/flutter-navigator2/
- - The Definitive Guide to Navigator 2.0 in Flutter, https://www.hungrimind.com/articles/the-definitive-guide-to-navigator-2
- - Flutter Navigation: Master the Routing - YouTube, https://www.youtube.com/watch?v=C293nr6C3lU
- - Understanding Futures and Async-Await in Dart - Vibe Studio, https://vibe-studio.ai/in/insights/understanding-futures-and-async-await-in-dart
- - Asynchronous programming: futures, async, await - Dart, https://dart.dev/libraries/async/async-await
- - Asynchronous programming - Dart, https://dart.dev/language/async
- - Future & Task: asynchronous Functional Programming | Sandro Maglione, https://www.sandromaglione.com/articles/async-requests-future-and-task-dart
- - Dart Asynchronous Programming | Dart Tutorial for Beginner - YouTube, https://www.youtube.com/watch?v=rWMnAkDrhg8
- - Flutter Concepts | Async Await and Futures | Dart - YouTube, https://m.youtube.com/watch?v=VkpXV0Q89Io
- - Send data to the internet - Flutter Documentation, https://docs.flutter.dev/cookbook/networking/send-data
- - Fetch data from the internet - Flutter Documentation, https://docs.flutter.dev/cookbook/networking/fetch-data
- - http | Dart package - Pub.dev, https://pub.dev/packages/http
- - Flutter Tutorial for Beginners: How to Make HTTP and API Calls with Flutter! - YouTube, https://www.youtube.com/watch?v=U7z5IeWuaLI
- - Understanding JSON Serialization in Flutter: A Comprehensive Guide | by Kavy mistry, https://medium.com/@kavyamistry0612/understanding-json-serialization-in-flutter-a-comprehensive-guide-363e99d017bd
- - JSON and serialization - Flutter Documentation, https://docs.flutter.dev/data-and-backend/serialization/json
- - Automatic Generate JSON Serializable In Flutter | by Naveen Srivastava | FlutterDevs, https://medium.flutterdevs.com/automatic-generate-json-serializable-in-flutter-4c9d2d23ed88
- - json_serializable | Dart package - Pub.dev, https://pub.dev/packages/json_serializable
- - Flutter Tutorial: JSON Serialization in Flutter | json_serializable | - YouTube, https://www.youtube.com/watch?v=PxkCCIqzPHw
- - Store key-value data on disk - Flutter Documentation, https://docs.flutter.dev/cookbook/persistence/key-value
- - Understanding Shared Preferences in Flutter - Numla, https://numla.com/blog/miscellaneous-17/shared-preferences-in-flutter-260
- - Shared Preferences in Flutter: A Complete Guide | by Manish Kumar - Medium, https://medium.com/easy-flutter/shared-preferences-in-flutter-a-complete-guide-ed70e34d37b6
- - shared_preferences | Flutter package - Pub.dev, https://pub.dev/packages/shared_preferences
- - Ultimate Guide to Using Shared Preferences in Flutter | by Pinki Singh - Medium, https://medium.com/easy-flutter/ultimate-guide-to-using-shared-preferences-in-flutter-711efd28c2ec
- - Animations in Flutter - Google Codelabs, https://codelabs.developers.google.com/advanced-flutter-animations
- - lottie | Flutter package - Pub.dev, https://pub.dev/packages/lottie
- - Lottie Flutter: A Guide to Adding Smooth Animations in Your App - DhiWise, https://www.dhiwise.com/post/lottie-flutter-guide-to-adding-smooth-animations-in-your-app
- - Flutter Lottie Animation Tutorial 2025 | Step-by-Step - YouTube, https://www.youtube.com/watch?v=6QpBjaGqYPg
- - Flutter Gems - A Curated List of Top Dart and Flutter packages, https://fluttergems.dev/
- Flutter Tutorial for Beginners - YouTube, https://www.youtube.com/playlist?list=PL4cUxeGkcC9jLYyp2Aoh6hcWuxFDX6PBJ




Comments (0)
No comments yet. Be the first to comment!